UI/UX Enhancements
Warning Message for Starting Cut without Running Process
MindCUT V5.4 now displays a warning message when attempting to start a cut without a running process, ensuring users remember to initiate the process before proceeding.
This warning message appears when you attempt to start the cut without any running process.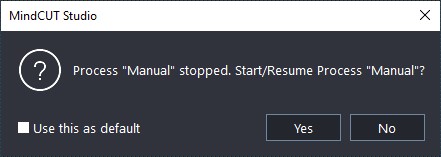
Enhanced License Information for Users
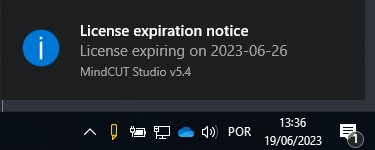
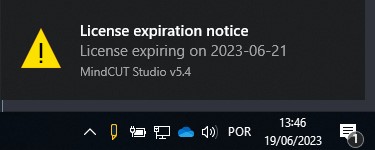
Users now receive an enhanced license expiration notice upon launching the application, providing timely information 15 days in advance of the expiry date.
This feature has been seamlessly integrated into the Windows notification system.
Quick Creation of Material with F12 Shortcut
The F12 shortcut now allows for instant material creation and tool validation when a source material is selected, eliminating manual steps and optimizing workflow efficiency.
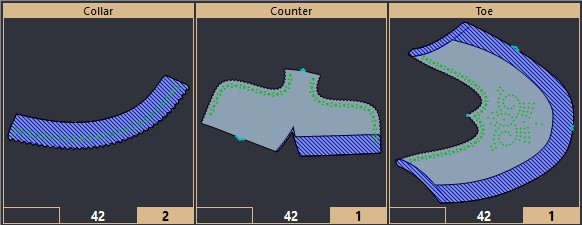
Enhanced Part Thumbnail Display now including Punches
Users can now visually observe the punches directly within the part thumbnails, making it easier to differentiate between similar-shaped parts that may have punches and those that do not. Ensuring accurate part selection and enhancing overall productivity.
The enhanced part thumbnail with punches is accessible across various stages, such as preparation, nesting, and cutting.
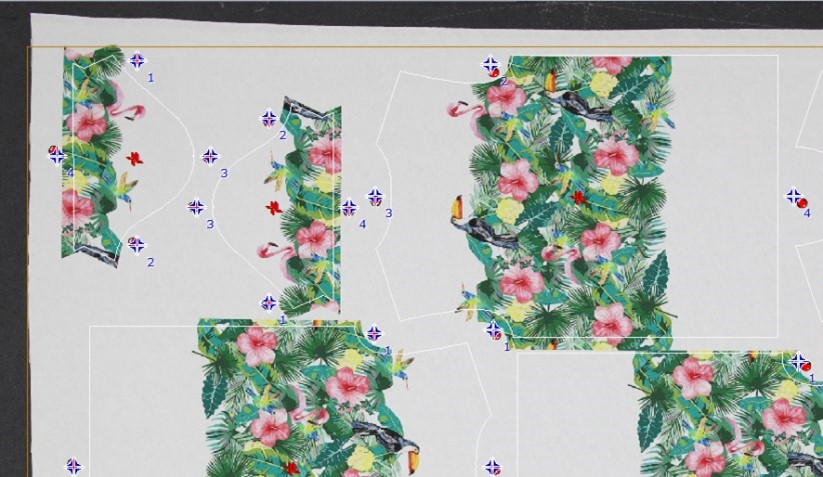
Visibility of Registration Marks in the View Menu
During normal operation, users can now customize the visibility of material and parts reference marks. This feature empowers users to have greater control and adaptability in working with registration marks throughout all operations.
To enable this feature, go to View > Parts and Material and select either Material Reference points or Part Reference points, or choose both options.
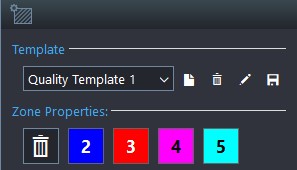
New Save Button for Quality Templates
To enhance visibility and user accessibility, a new save button has been introduced in the interface to allow users to easily save quality templates.
To check this new improvement: navigate to Edit Material > Apply Quality Template
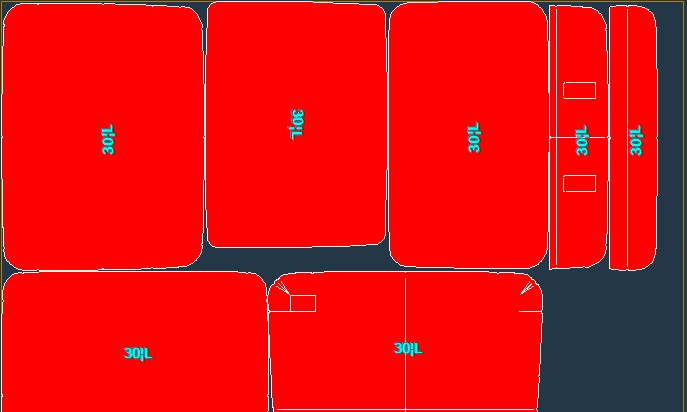
Improved Text Orientation for Enhanced Readability
Introduce the option to align text within parts based on the major axis, allowing for improved readability when cutting strips or other elongated shapes, ensuring that the text follows the orientation of the part for better visibility and understanding.
Enable the Smart Label by checking the option Placed Parts>Smart Label in Configuration>Preferences>Interface
Cut Setting Optimizations
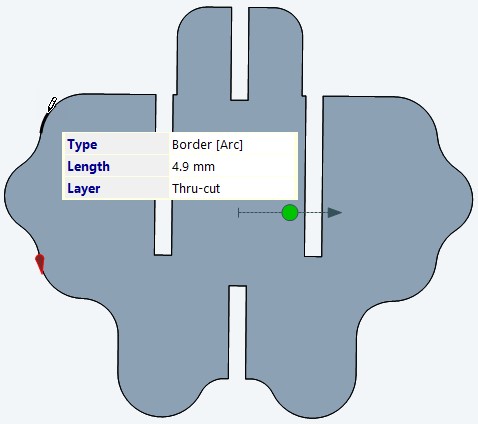
Improved cut quality by supporting arcs
In order to achieve better cutting quality, the latest update includes improvements to arc cutting. The system now supports arc constructs, enabling optimal machine cutting quality for curved shapes. This enhancement ensures smoother and more precise cuts, resulting in improved overall cut quality.
To check the cut configurations, navigate to Simulation in Cut tab.
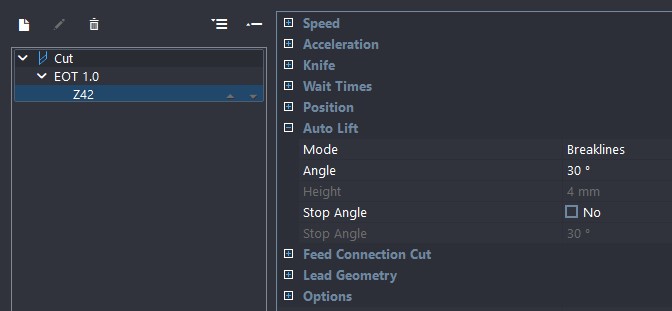
Auto-Lift feature is now activated by default
To mitigate operation errors and enhance cut quality, by default, the Auto-Lift mode is now set to a 30º breaklines angle.
Access default Auto-Lift settings in Configuration>Machine>Cut Configuration.
Automatic Conversion of Notch Tools to Points
Notch tools are now automatically converted to points without the need for manual adjustments when changing cut methods. This improvement enhances workflow efficiency.
Access the model notches settings in Configuration>Machine>Cut Configuration

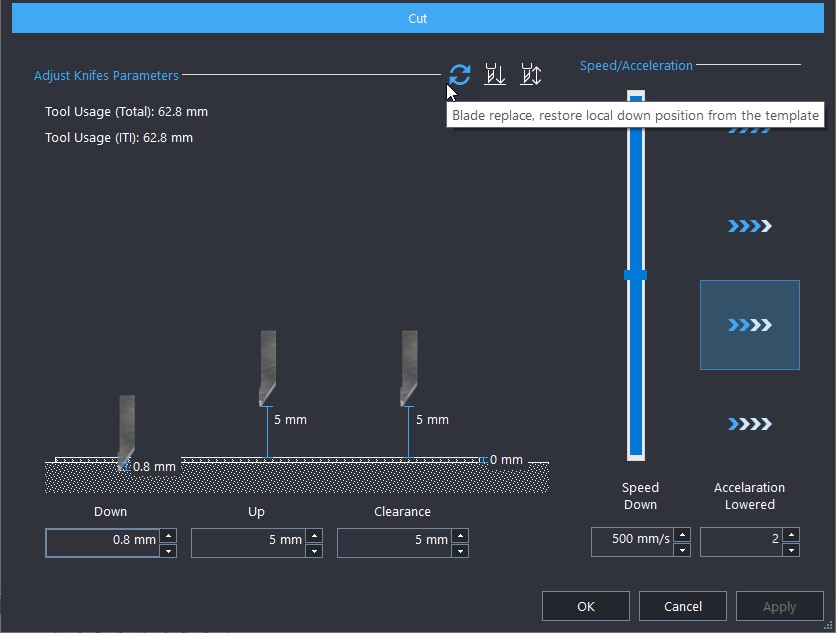
Blade Replacement Process Guidance
A new button simplifies blade replacement by resetting all local model settings to default during the process.
To access this new feature in the Cut Tab, simply left-click on the desired tool to access the local tool settings.
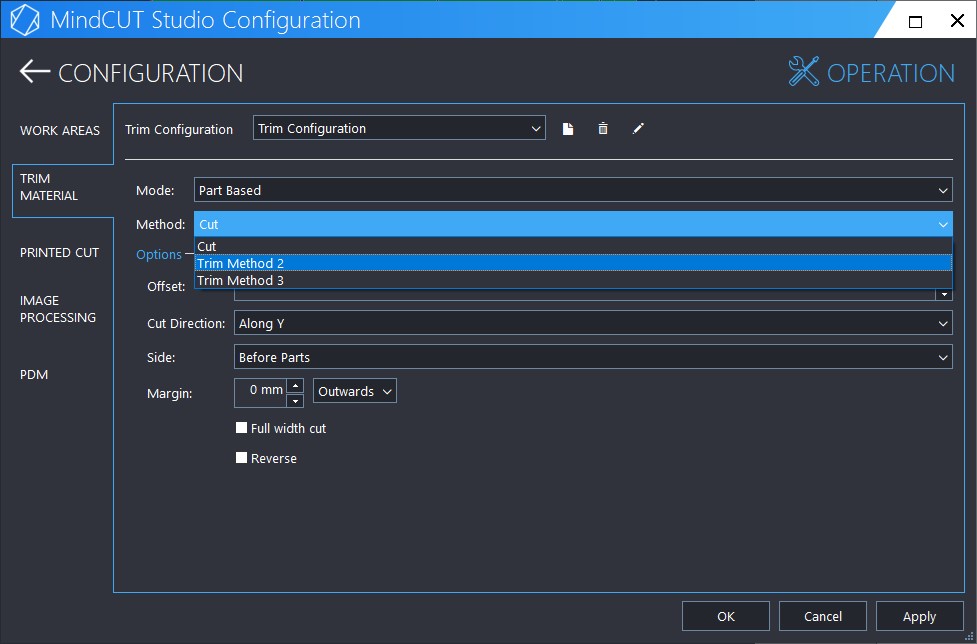
Trim cut using a different cut template
The latest update introduces the capability to use a different cut template for trim cuts. Users now have the flexibility to select an alternate cut template specifically designed for trim operations.
To access the Trim options, navigate to Configuration>Operation>Trim Material
Enhanced Common Line Removal at Material Border
Common lines from parts placed on material border are now ignored if option activated Now, users have the option to remove lines within a specified tolerance that are common with the material border, providing a more precise cut.
Access default Common Line Removing settings in Configuration>Machine>Cut Configuration.

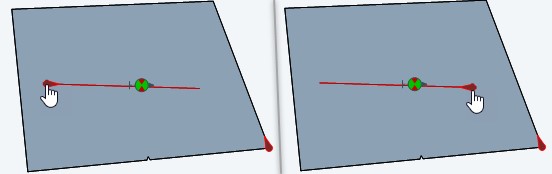
Flexibility in Internal Line Cutting Direction
Enhance functionality by allowing the change of cutting direction for internal lines with a simple click or double-click action.
To check the cut configurations, navigate to Simulation in Cut tab.
Enhanced Line Smoothing for Model Importing
Introduce a new functionality that enables users to smooth lines during model importing by automatically adding extra points, enhancing the cut quality.
Enable the addition of smooth lines in MindCUT by creating a rule set within the Model Importer.
Main Features
Material expand on two materials simultaneously
Boosting productivity, the latest update allows for the simultaneous auto-expansion of two materials, offering increased efficiency and workflow flexibility.
To configure the Expand Material option go to Configuration>Workflow>Process
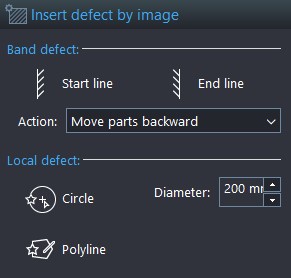
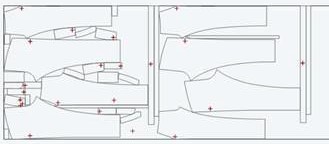
Add functionality "by sketch” in Insert Defects tool
The Insert Defects mode has been improved with the addition of a drawing option, allowing users to mark defect areas by sketching. This enhancement provides greater control and precision in identifying and managing defects in materials.
To check this new improvement: navigate to Edit Material> Insert Defect By image
Added Support for New Canon SDK
The application now supports the latest Canon SDK, enabling seamless integration with new Canon cameras for enhanced functionality and compatibility.
Improved process during ICC Calibration
During ICC calibration, the beam now moves a few centimeters away from the material when the message to remove excess material appears. This enhancement provides technicians with a safety margin, making the process of removing material easier and more secure.
To access ICC calibration menu, navigate to Configuration>Machine>Hardware> ICC
Enhanced ICC Material Edge Alignment
Improved performance with dense point sets and added the capability to realign materials after contour alignment, providing greater flexibility and accuracy.
To check this new improvement: navigate to Using Machine> By Contour (IC)
Improved Efficiency in Renest Process
Enhanced renest feature for roll materials, improving efficiency and reducing material waste. Optimized algorithm fills empty spaces with smaller parts, maximizing material utilization and productivity.
To access Renest options, navigate to Configuration>Workflow>Options

Improved Nesting Efficiency with kit orientation lock
Enhance nesting efficiency by introducing the “kit orientation lock” feature, which allows for better orientation and placement of suit pieces of different sizes, optimizing material usage and reducing waste.
To access Nesting settings, navigate to Configuration>Nesting>Auto-Nesting
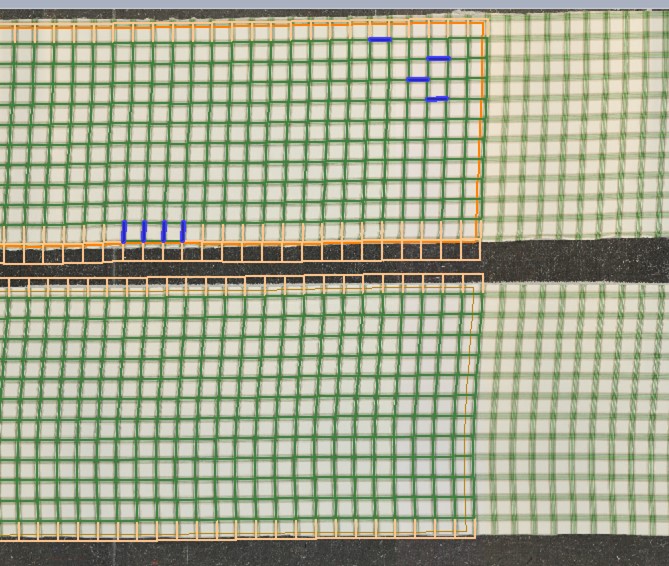
Exclude "Selvage" for Validation
Exclude the material selvage from the validation process of point detection (blue points) by introducing a new parameter (in mm) to exclude points detected within the material's selvage margin.
Configure the Salvage margin in the Material Settings>Pattern Matching> Tolerance
Text Printing Support for Leibinger
Introduce the capability to support text printing in Leibinger, enabling the quick and convenient creation of text labels in various scenarios.
Configure Leibinger settings by accessing Configuration>Machine Hardware for connectivity setup and Configuration>Methods to define printer default settings.
Part stretch shown on Pickup
Allows users to visualize the stretch percentage of parts directly on the pickup pane and/or printed label.
To configure Pickup information, navigate to Configuration>Pickup>Pickup Ordering

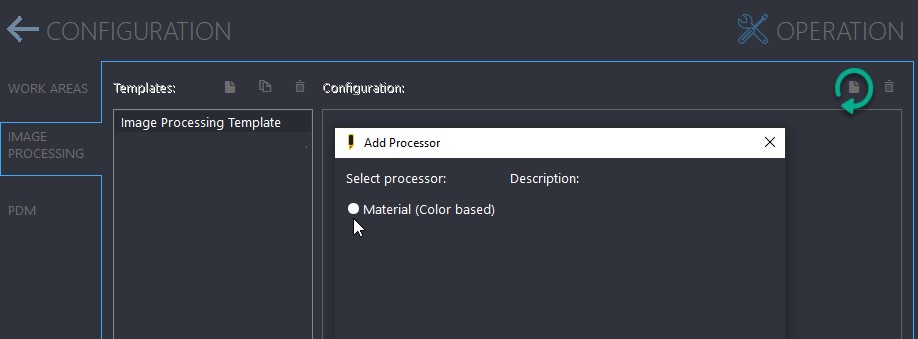
Streamlined Interface for Leather Sketching Tools
Enhance the usability of MindCut DIVA's sketch tool for leather by selectively blocking irrelevant image processing templates, resulting in a cleaner and more efficient user interface.
To access image processing settings, go to Configuration>Operation>Image Processing